How to Pour or lay liquid screed
As with everything in the building game, preparation is key!
There are several steps that need to be taken to prepare a floor for screeding. The actual screeding is likely to be carried out by an experienced team of professional screeders as this is a typical requirement from many material suppliers that generally train their material installers, these include Tarmac, Breedon, Cemex and many more.

Step 1: Measuring the Amount of Screed Required
It is critical to get the right amount of screed; a contractor will probably not leave this to the end-user but will visit site and accurately measure the amount of screed that is needed.
Step 2: Remove debris and lay insulation
The most important thing is to ensure that the area to be screeded is made watertight, but before doing so, it is best practice to remove all the dust and debris from the floor. Then, if adding insulation, this should be done now, below the waterproofing membrane.
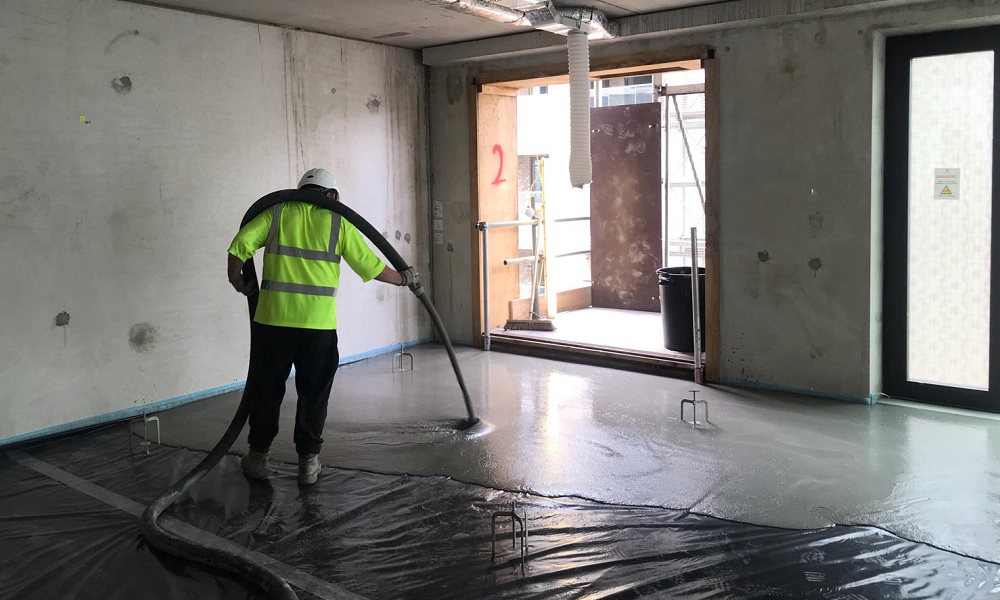
Step 3: Lay the watertight membrane
Polyethene sheeting (1000 gauge or thicker) is used to create a waterproof membrane to ensure that there is no leakage of the screed when it is pumped in.
When finished there will be a shallow, water-tight polyethene “pool” where the screed will collect.

Step 4: Waterproof Shuttering
Formwork will be needed around obstacles and troublesome pipework etc to ensure that water and screed does not get to them.
Where there is shuttering, such as across doorways or steps, this needs to be sealed with mastic or expanding foam so that it is watertight. Expansion foam will generally be needed across doorways.
Step 5: Secure Under-floor Heating Pipes
If using under-floor heating, then the pipes or trays should be secured now. The clips are generally self-sealing, but it is important that nothing is able to float up when the liquid screed is poured. So using Metex PipeTak to secure the clips in place is recommended.
Now that everything is sealed and watertight the site is ready for the screed to be poured. At this stage, it is a good idea to fill the under-floor heating pipes as this will stop them floating up in the liquid screed and stop them from being squeezed by the weight of the screed.
How to Pour Liquid Screed
The same “rules” apply for screed as they do for concrete; do not layover 30°C or under 5°C and falling. You’re good to go if the temperature is over 3°C and rising.
As mentioned, it is unlikely that a material supplier will allow a client to pour the screed themselves, so the contractors will arrive a few hours early to get ready before the mixer arrives with the screed. They will check that the area to be screeded is watertight and then will work out the level that the screed will go to across the room using screed levelling tools.
They will use screed levelling tripods positioned in various points across the room. The liquid screed tripods (AKA Screedpods) are then adjusted so that the flat plate at the centre of the tripod is at the height that the screed will be. This is calculated using a datum level which is transferred to each screed tripod using a laser level.
They will also get the pump ready so that when the mixer arrives with the screed it can be poured straight into the pump and piped to where needed.
The screed is poured into the area where it is needed and spread out by someone wading through it. It is the consistency of cream so runs to all corners of the polyethene pool. It is filled up until the level of the plate on the screed tripod. At this point, there is enough screed and the pump will be stopped and the floor screed tripods removed.
The screed is then tamped using Screed Dapple Bars twice; once fairly vigorously to get any air bubbles out of the screed and the second time more gently without leaving the surface to get a smooth finish.
They will work back to the doorway leaving the whole surface smooth, ready to start drying. This whole pouring and dappling process will not take long; 15 minutes for around 25m2. Now close the doors for up to 72 hours so that the initial drying does not happen too quickly as cracking might occur; humidity needs to be kept high to slow the drying.
Drying Time for Liquid Screed
Liquid calcium sulphate screeds dry at a broadly similar rate as traditional screeds; 1 day for every mm up to 40mm, and 2 days for depths over 40mm.
As above for the first 72 hours, keep doors closed to reduce ventilation so that drying does not happen too quickly and lead to weaknesses or cracking.
After about 24 hours it should be possible to walk on the surface, but it will be a week before building non-load-bearing structures like partition walls can start.
It is possible to speed the drying process by using a dehumidifier after 72 hours, and if there is under-floor heating this can be turned on gradually from the lowest setting after 7 days. Removing the top surface laitance will also help the screed to dry out more quickly.
The screed should be totally dry before finishing with your desired floor covering.
Preparation for Laying Floor Covering on a Liquid Screed
One of the issues with using a calcium sulphate liquid screed is that there is a little work to be done before the floor finish can be laid.
As the screed dries a thin crust forms on the top which is called laitance. This needs to be removed by sanding before the floor is tiled, however if other floor coverings that do not need an adhesive are to be used you only need to brush and vacuum the residue.

Removing the laitance is one of the disadvantages of a (gypsum) anhydrite liquid screed. It will need to be sanded off, ideally after about a week as it gets harder to remove if it is left too long.
Once the laitance has been removed the floor needs to be sealed before your adhesive is applied as it is a porous surface and will absorb the moisture from the adhesive causing it to dry too quickly.

